November 14, 2019
| Article | by Joe Arduini | Search Engine Optimization
How to Use Google Tag Manager to Implement localBusiness Schema
Schema.org structured data markup can be an effective way to “highlight” content on your site for more effective search engine consumption. Though the outcome of having structured data in place can have a positive impact on the way your site is presented visually in search to users, the code itself works behind the scenes and is not visible in the same way that copy or images are. Schema.org is not required to achieve featured or more rich snippets in search; however, it can help in making sure the data contained within those results is more closely represented with elements determined by site owners and marketers.
Local business information, product descriptions, reviews, and FAQs are just some of the types of content our search engine optimization team examines that can be marked up with Schema.org to better help search engines understand their context within the rest of your site’s content. Though Schema.org does not “interfere” with your public facing content for users, it can still interfere with other code on your site related to functionality, layout, and speed if not implemented properly. This is where Google Tag Manager (GTM) can be an effective tool in placing Schema.org on your website.
Benefits of Using Google Tag Manager for SEO
Unlike changes directly to a site’s code, once Google Tag Manager is set up on your site, you have the flexibility of “injecting” other tracking and code-based elements within your tag’s container onto the site without having to directly affect any content itself. This is not to say Google Tag Manager is the preferred method of updating content or code for SEO purposes, but it can be beneficial if items like access, speed of implementation from a developer, or compatibility are restrictions that halt potential SEO improvements.
Additionally, Google has recently suggested that it supports Google Tag Manager implementation.
localBusiness Schema
In this exercise we will be covering the steps of implementing localBusiness schema for a website with multiple locations or local businesses. In order to scale this with the usage of only one tag and one trigger, we need to utilize a series of variables that populate unique information semi-dynamically for specific pages.
A hotel, for example, can not only benefit from having localBusiness schema markup for its business, but also for each of the restaurants, concert venues, bars, and gift shops within. By building the framework to mark up each of these venues or outlets at scale with lookup table variables, we can reduce the amount of upfront work involved in creating unique tags and trigger for each property, as well as save time and effort whenever a new venue page is added or the business information for an existing venue changes.
**Disclaimer - although this method can be an easy way to implement code without direct access to the code or content management system of a site, you should still always seek approval from the client/site owner as well the Analytics lead/owner of your Google Tag Manager account prior to taking the steps listed below.
Now let’s dive in!
Step 1 - Building the localBusiness Schema.org Code Outline
The first step to creating a semi-dynamic Schema code in Google Tag Manager is to create the outline draft of the code itself. Once this is created, we can identify which pieces of information will stay constant across all of our businesses (if applicable) and which ones will need to change per location.
One of the quickest ways to do this is with the help of a tool. A structured data markup assistant allows you to input data relevant to the Schema.org code you wish to build (in this case localBusiness) and spits out the code itself.
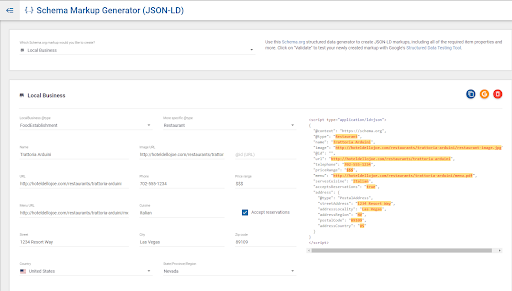
In this example we’ll be using Merkle’s Schema Markup Generator.
Once we’ve input all of the information related to the business using the fields and drop-down menus, we will receive an output of code that should look something like below (for the sake of this walkthrough, we will use a basic Schema example. You may also choose to include additional information within your localBusiness Schema such as geo coordinates and hours of operation).
We can then copy the code in the dialogue box to the right and paste it into a Word document or other text-based editor for further tweaking.
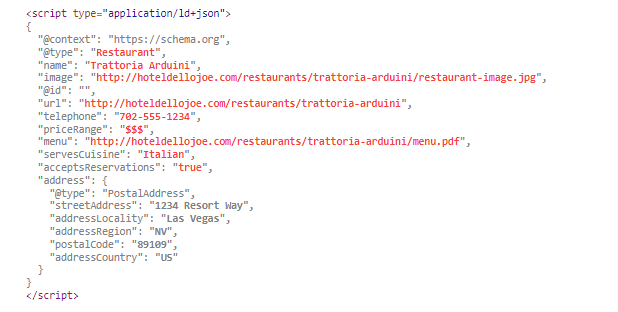
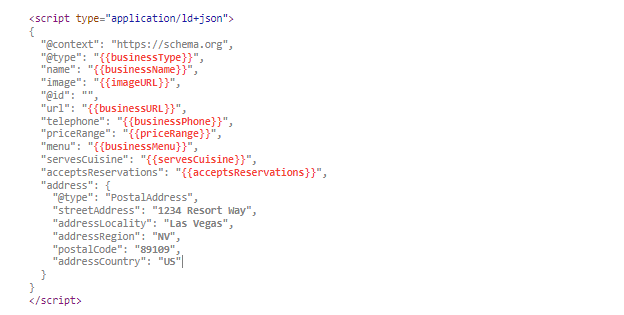
Now that we have pulled our code from the generator tool, the next step is identifying which pieces of information will be unique to each individual business page on our site. These will be the fields we will need to replace with our lookup table variables. In the figure below, these are all highlighted with red text. In this example, restaurants located within a hotel usually share the same address information. If you have a corporation with multiple location pages, however, you may need to use additional variables for streetAddress, addressLocality, addressRegion, postalCode, and addressCountry.
Step 2 - Building the Variables
-
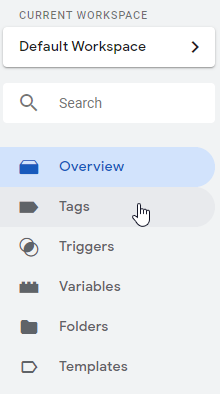
Once inside your container’s default workspace, choose “Variables” to create a new variable.

-
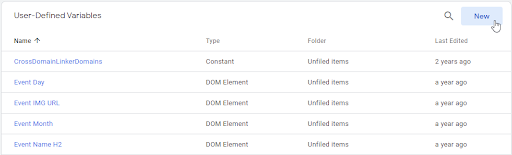
There are two sets of variables: 1) Built-in variables and 2) User-defined variables. We need to create a new user-defined variable.
-
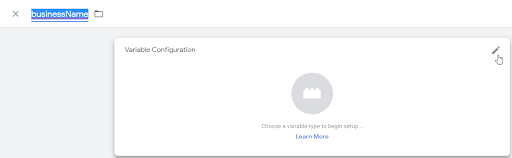
Next, let’s name our variable and then select the pen icon in the upper right hand corner of the variable card to choose the type of variable. We’ll start with a variable to populate the business name for all of our locations.
You can name variables however you wish, but it usually helps to keep your naming convention consistent and easy to remember for plugging them into your code later. My personal format is to limit variable names to two words, without a space and capitalize the first letter of the second word for separation (similar to Schema.org code formatting). Use whatever works best for you.
-
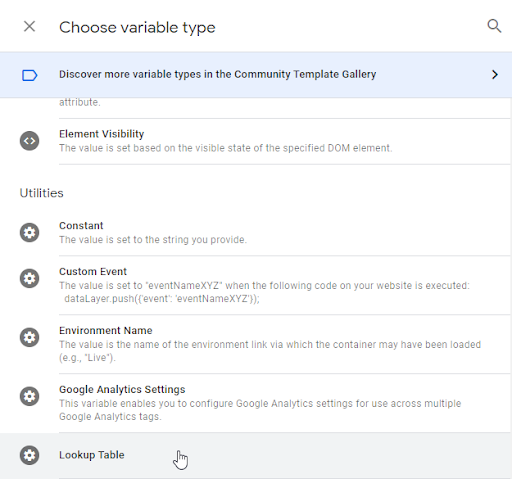
Once we’ve clicked on the pen icon, we will be prompted to choose our variable type from a list. “Lookup Table” is located under the category “Utilities.”
-
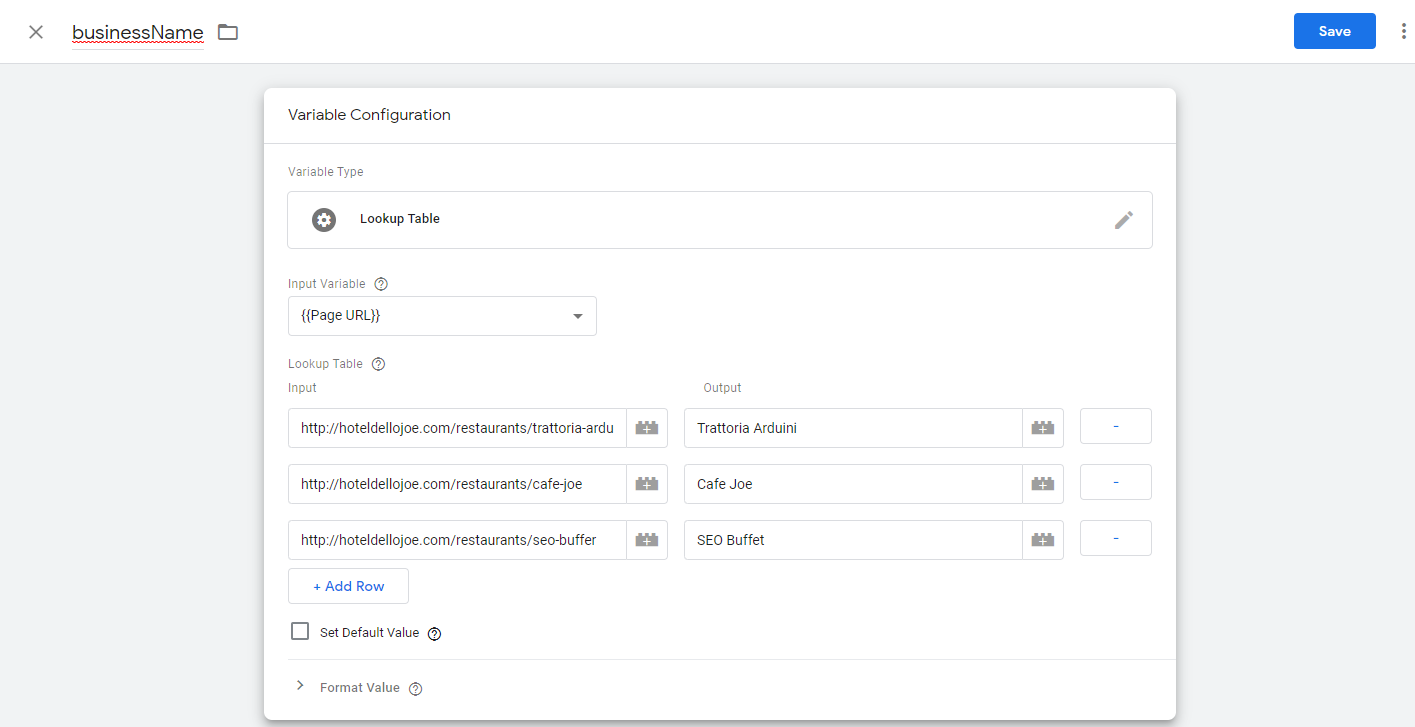
Before we start adding rows, we need to first identify what the “Input Variable” for our lookup table will be. In this case we will use {{Page URL}} since our businesses’ information will be unique based on the URL.
-
Now we can begin building our lookup table variable. Add rows for every business, with their respective page URLs on the left and the output (in this case, our business name) on the right. Save the variable.
-
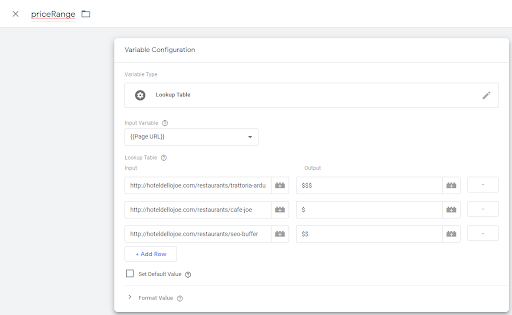
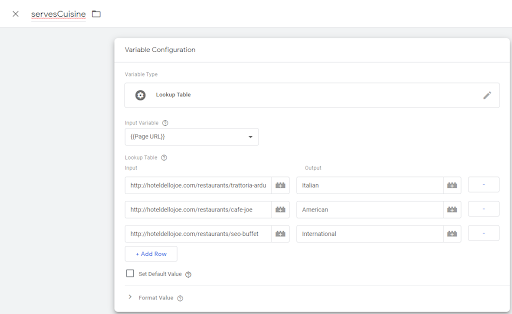
Repeat the steps from a-f above and create individual lookup table variables for each of the red-text highlighted items in our initial piece of Schema.org code that we generated back at Step 1. Here are examples of what your lookup tables might look like for the phone number, price range, and cuisine of your locations.

Step 3 - Inputting the Variables into the Schema.org Code
Now that we have our variables set up to display different information related to each specific business relative to its URL, we need to update the original Schema.org code.
Here is an example of what your schema should now look like (note that variables are case sensitive, and also identified with double curly brackets on both sides).
Step 4 - Creating a Tag and Trigger
Now that we have created lookup table variables for all of our businesses and updated our Schema.org code, it is time to create the tags that will “inject” this code into our business pages via our Google Tag Manager container.
Additionally, since our site hosts other, non-business location pages, we will want to set up a trigger to make sure our tag only “fires” (is activated) on the location pages that we want it to be.
-
Back in our container’s default workspace, let’s now choose “Tags.”
-
From the top of the table, choose “New.”
-
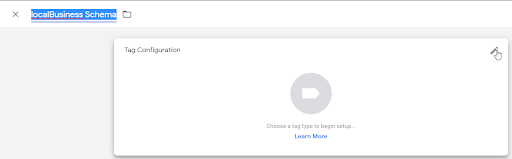
Name your tag and then click on the pen icon in the top right corner of the card labeled “Tag Configuration.” We will save the “Trigger Configuration” card on the bottom for later.
-
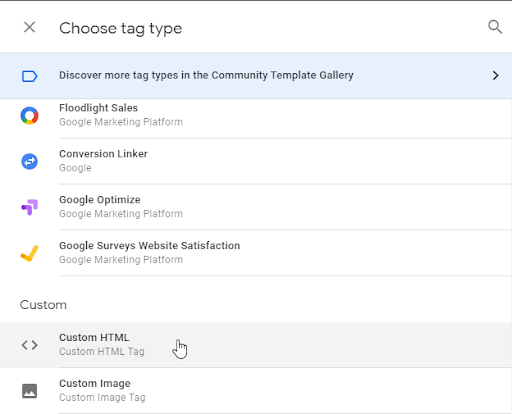
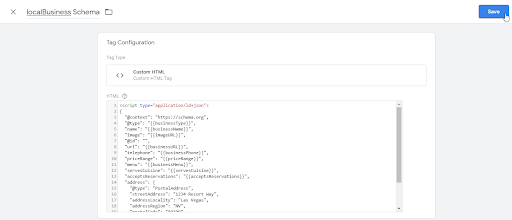
From the list of options under “Choose Tag Type,” select “Custom HTML” located under the category “Custom.”
-
Inside the code box labeled HTML in blue, paste the entirety of your Schema.org code that has been updated with the variables from the lookup tables and click save.
-
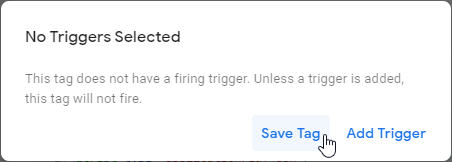
A warning will appear letting you know that a trigger has not been designated for your tag and that your tag will not fire until this has been completed. You can choose to add a trigger right then and there, especially if one already exists for the tag you have just created. I typically like to save my progress in as many intervals as possible, so for the sake of this walkthrough, we will disregard this notification and choose “Save Tag.”
-
Back in the default workspace menu, choose “Triggers.”
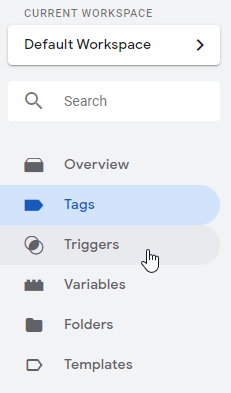
-
From the top of the table, choose “New.”
-
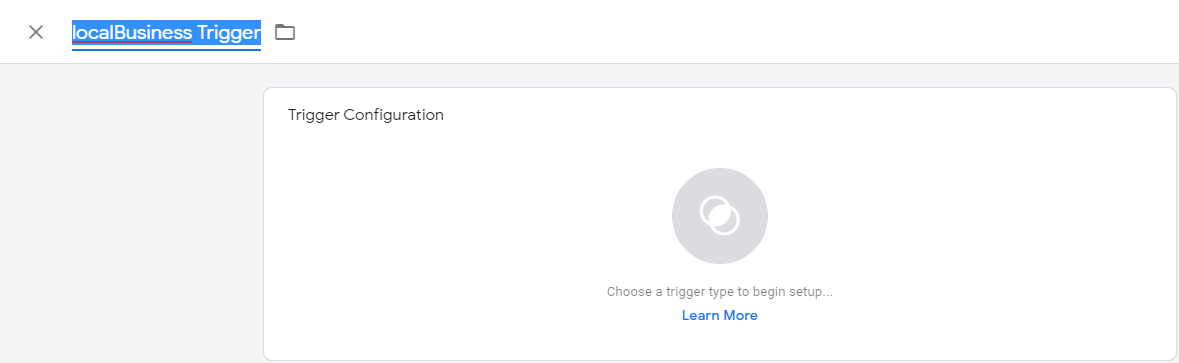
Name your trigger and then click on the pen icon in the top right hand corner of the “Trigger Configuration” card.
-
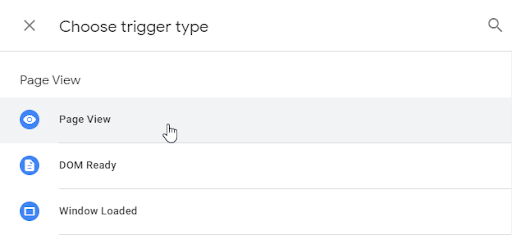
In the “Choose Your Trigger Type” menu, select the first option titled “Page View” under the first category, “Page View.”
-
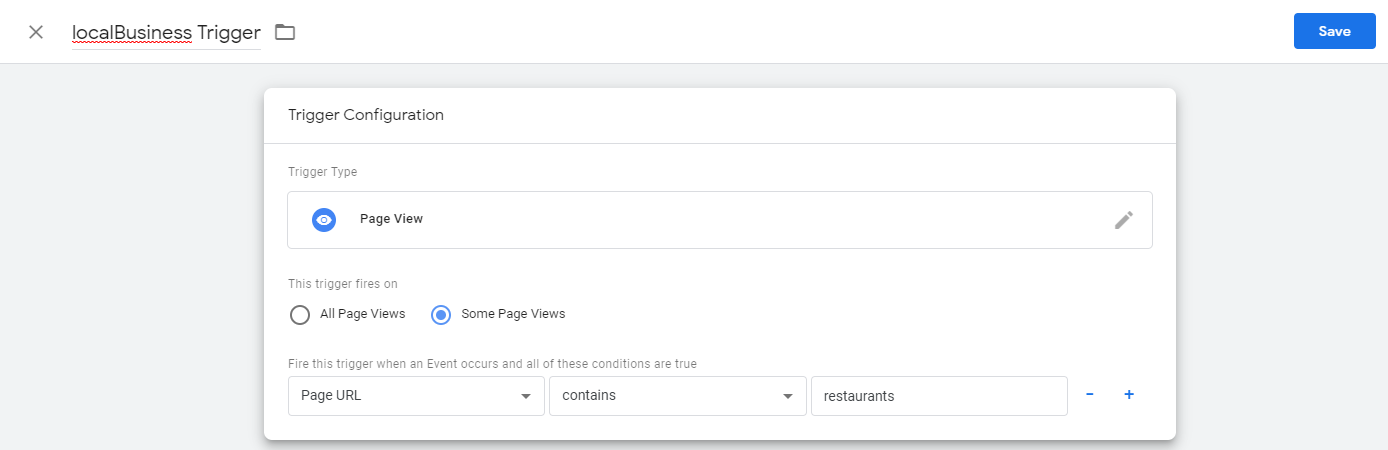
Since we only want our Schema.org code to be activated on its relative business pages (in this case, restaurants), we will choose “Some Page Views.” Here’s where things may vary depending on your site structure. You will want to use the drop downs (labeled “Page URL” and “contains” in this example) to determine which series of pages your tag should fire on. In this case, all of our restaurants are under the folder “restaurants” in our URL pathway.
With this in mind, for this example, we can set a trigger rule to only cause our tag to fire when a Page URL is accessed that contains “restaurants” in the URL pathway. This will ensure that our Schema.org code activates on all restaurant pages and nowhere else on the site.
Click “Save”
-
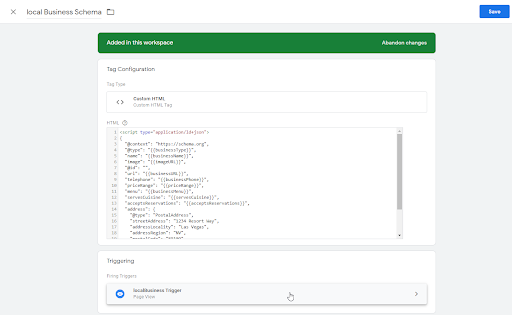
Navigate back to the “Tags” section of your workspace in Google Tag Manager and choose the tag you created in steps 4a-4f (in our case, the one named “localBusiness Schema”).
-
This time in the bottom card labeled “Trigger Configuration,” click the pen icon in the top right and from the list and select the trigger you created in steps 4g-4k (in our case, the one named “locaBusiness Trigger”).
-
Now that there is a trigger associated with our tag, click “Save” in the top right-hand corner.
Step 5 - Publish the Tag
Once the localBusiness Schema tag has been set up, making use of our lookup table variables, it is time to publish our tag. Unless you are the sole manager of your business’ Google Tag Manager account, it is probably best to leave this up to your Analytics supervisor or the account owner.
If you are authorized and have high enough level permissions within Google Tag Manager to publish, then click “Submit” from the top right hand corner of your container’s workspace, followed by “Publish.” (We suggest using the Preview mode to QA your work prior to publishing even if you are the primary administrator of the Google Tag Manager account.)
Step 6 - Test
Although Google seems to be more approving of utilizing Google Tag Manager for SEO-related implementations, their own structured data testing tool still does not recognize Schema.org code injected via GTM when scanning URLs that have been marked up in this manner. That isn’t to say that the code is not there and functional, however.
Once your tag has been published, you can verify its presence by navigating to each of the pages that it should be firing on and using your browser’s developer tools to search for the code.
In Chrome, for example, you would do this by right-clicking on an empty space of the page you want to examine and choose “inspect.”
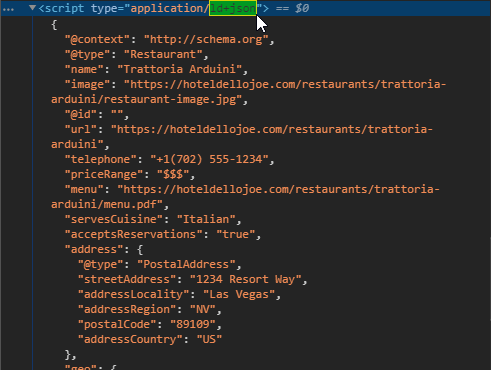
Inside of the developer window, then press CTRL+F on your keyboard and search for “ld+json” to find your code. You may need to expand the code using the triangle to the left of “<script type” to view the entirety of the Schema.org code and verify its contents.
Since we implemented our code semi-dynamically using lookup table variables, the highlighted data from our initial should be replaced with the relative business information related specifically to each unique page our tag is now set to fire on.
This is just one way to leverage Google Tag Manager to implement SEO changes. What are some methods you have tried or would like assistance with? Comment below!